Installing {golem}
You can install the stable version of golem from CRAN:
install.packages("golem")The development version of golem can be installed from GitHub using the remotes package:
remotes::install_github("Thinkr-open/golem")Getting started
Note before using golem:
A golem app is contained inside a package, so knowing how to build a package is highly recommended. On the plus side, everything you know about package development can be reused in golem.
A golem app works better if you are working with
shiny modules, so knowing how modules work is recommended, but not mandatory.
In the rest of the Vignettes, we’ll assume you’re working in RStudio.
Create a package
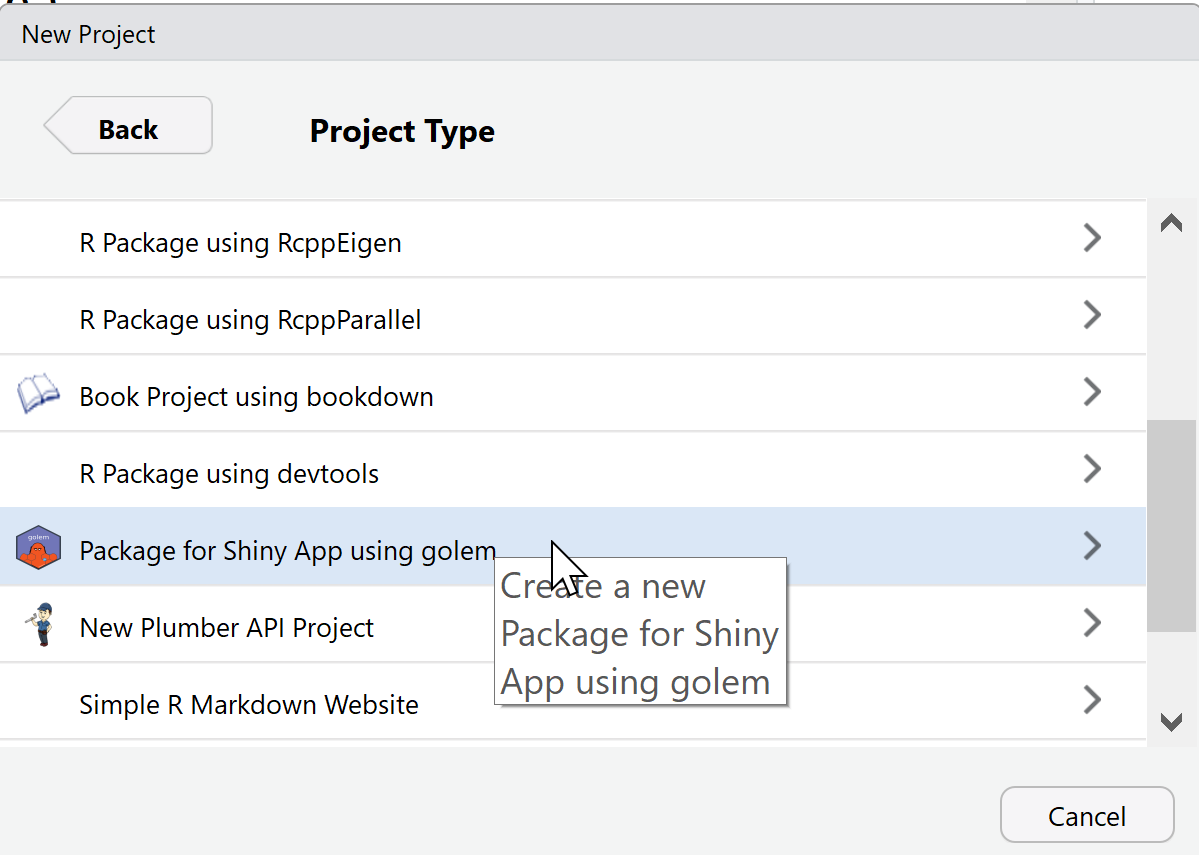
Once the package is installed, you can got to File > New Project… in RStudio, and choose “Package for Shiny App Using golem” input:
If you want to do it directly via the command line, use:
golem::create_golem(path = "path/to/package")This command allows you to create “illegally-named” package (for
example, 1234) by passing the check_name
argument to FALSE. Note that this is not recommended and
should only be done if you know what you are doing.
Once you’ve got that, a new RStudio project will be launched. Here is the structure of this project:
#> ├── DESCRIPTION
#> ├── NAMESPACE
#> ├── R
#> │   ├── app_config.R
#> │   ├── app_server.R
#> │   ├── app_ui.R
#> │   └── run_app.R
#> ├── dev
#> │   ├── 01_start.R
#> │   ├── 02_dev.R
#> │   ├── 03_deploy.R
#> │   └── run_dev.R
#> ├── inst
#> │   ├── app
#> │   │   └── www
#> │   │       └── favicon.ico
#> │   └── golem-config.yml
#> └── man
#>     └── run_app.Rd
If you’re already familiar with R packages, most of these files will seem very familiar to you. That’s because a golem app IS a package.
DESCRIPTION&NAMESPACE: Package meta-data.R/app_config.R: Used to read inside golem config file located atinst/golem-config.yml.R/app_server.R,R/app_ui.R: Top level UI and server elements.R/run_app.R: a function to configure and launch the application.dev/: Scripts that will be used along the process of developing your app. You don’t need to fill all the script before starting: use them as a notebook for keeping track of what you’re doing all along the project life.inst/app/www: Where you will add external dependencies inwww(images, css, etc), notably added with thegolemfunctions used to create external resources.man: Package documentation, to be generated by R & roxygen2.
dev/01_start.R
Once you’ve created your project, the first file that opens is
dev/01_start.R. This file contains a series of commands
that you’ll have to run once, at the beginning of the project.
Note that you don’t have to fill everything, even though it’s strongly recommended.
Fill the DESCRIPTION
First, fill the DESCRIPTION by adding information about
the package that will contain your app. The first function,
fill_desc(), can be used to fill your
DESCRIPTION file:
golem::fill_desc(
  pkg_name = "shinyexample", # The name of the golem package containing the app (typically lowercase, no underscore or periods)
  pkg_title = "PKG_TITLE", # What the Package Does (One Line, Title Case, No Period)
  pkg_description = "PKG_DESC.", # What the package does (one paragraph).
  authors = person(
    given = "AUTHOR_FIRST", # Your First Name
    family = "AUTHOR_LAST", # Your Last Name
    email = "AUTHOR@MAIL.COM", # Your email
    role = c("aut", "cre"), # Your role (here author/creator)
    set_options = TRUE # Set the global golem options
  ),
  repo_url = NULL, # The URL of the GitHub repo (optional),
  pkg_version = "0.0.0.9000" # The version of the package containing the app
)
About the DESCRIPTION file.
Additionally, fill_desc() sets a series of recommended
global options in golem-config.yml that will be reused
inside golem.
Set common Files
If you want to use the MIT license, README, code of conduct, lifecycle badge, a news file, etc.
## See ?usethis for more information
usethis::use_mit_license("Golem User") # You can set another license here
usethis::use_readme_rmd(open = FALSE)
usethis::use_code_of_conduct()
usethis::use_lifecycle_badge("Experimental")
usethis::use_news_md(open = FALSE)
See {usethis}
for more info about these functions.
Use Recommended Packages
This will add shiny, DT, attempt, glue, htmltools, and golem as dependencies to your package:
golem::use_recommended_deps()Add various tools
-
If you want to change the default favicon:
# Remove current favicon
golem::remove_favicon()
# Add a new one
golem::use_favicon(path = "path/to/favicon")
Note that you can add an URL, and the favicon will be downloaded to the
inst/app/wwwfolder.
Note: If you are deploying your app with ShinyProxy, your favicon should have the
.pngextension, otherwise it is not going to work.
-
Utils: these two functions add two files with additional helper functions for your golem project. They can be used along the process of building your app:
golem::use_utils_ui(with_test = TRUE)
golem::use_utils_server(with_test = TRUE)
For a detailed description of the generated functions see the respective files
R/golem_utils_server.RandR/golem_utils_ui.Rfor which also default tests are added intests/testthat(to suppress this setwith_test = FALSEin the above calls).
Try the app
To launch the app run:
golem::run_dev()You’re now set! You’ve successfully initiated the project and can go
to dev/02_dev.R:
rstudioapi::navigateToFile("dev/02_dev.R")